Showing posts with label LED LIghts. Show all posts

Wednesday, November 2, 2022

You're Weird - Light up card with Chibitronic LED Stickers

  Hi Everyone,

For today's card I have used a stamp set from Heffy Doodle and LED Stickers from Chibitronics.

For this card I have used the new 'Craft with light kit'.  It makes craft with Chibitronics so much easier as everything you need is in one pack.


Ingredients

Stamp Set:  You're Weird

Medium:  Copic Markers

Electronics:  Craft with Light kit from Chibitronics

Background:  Distress Inks & Amsterdam White Ink

(Twisted Citron, Salty Ocean, Blueprint Sketch, Faded Jeans, Black Soot)

Card Stock:  X-Press It Blending Card

Ink:  MFT Extreme Black

Other:  White Gelly Roll 08 Pen, Shimmer Pen, Glossy Accents


Method

1. Background

Firstly, I stamped the images onto X-Press It Blending Card and coloured them with Copic Markers.  I have then cut them out using the coordinating dies.

The background has been created using distress inks (listed above) and Amsterdam ink.


2. Battery Holder

This card will measure 14 x 10cm once complete.

I have used the Silhouette Cameo to cut the layers for the battery holder.  I glued 7 of these together.

I have glued them together using Liquid Glue from Bearly Arts.  If find this glue does not warp the card and makes it really strong.

I put plain card stock on the back of this card to finish this card.

The card used is 300gsm smooth white card,


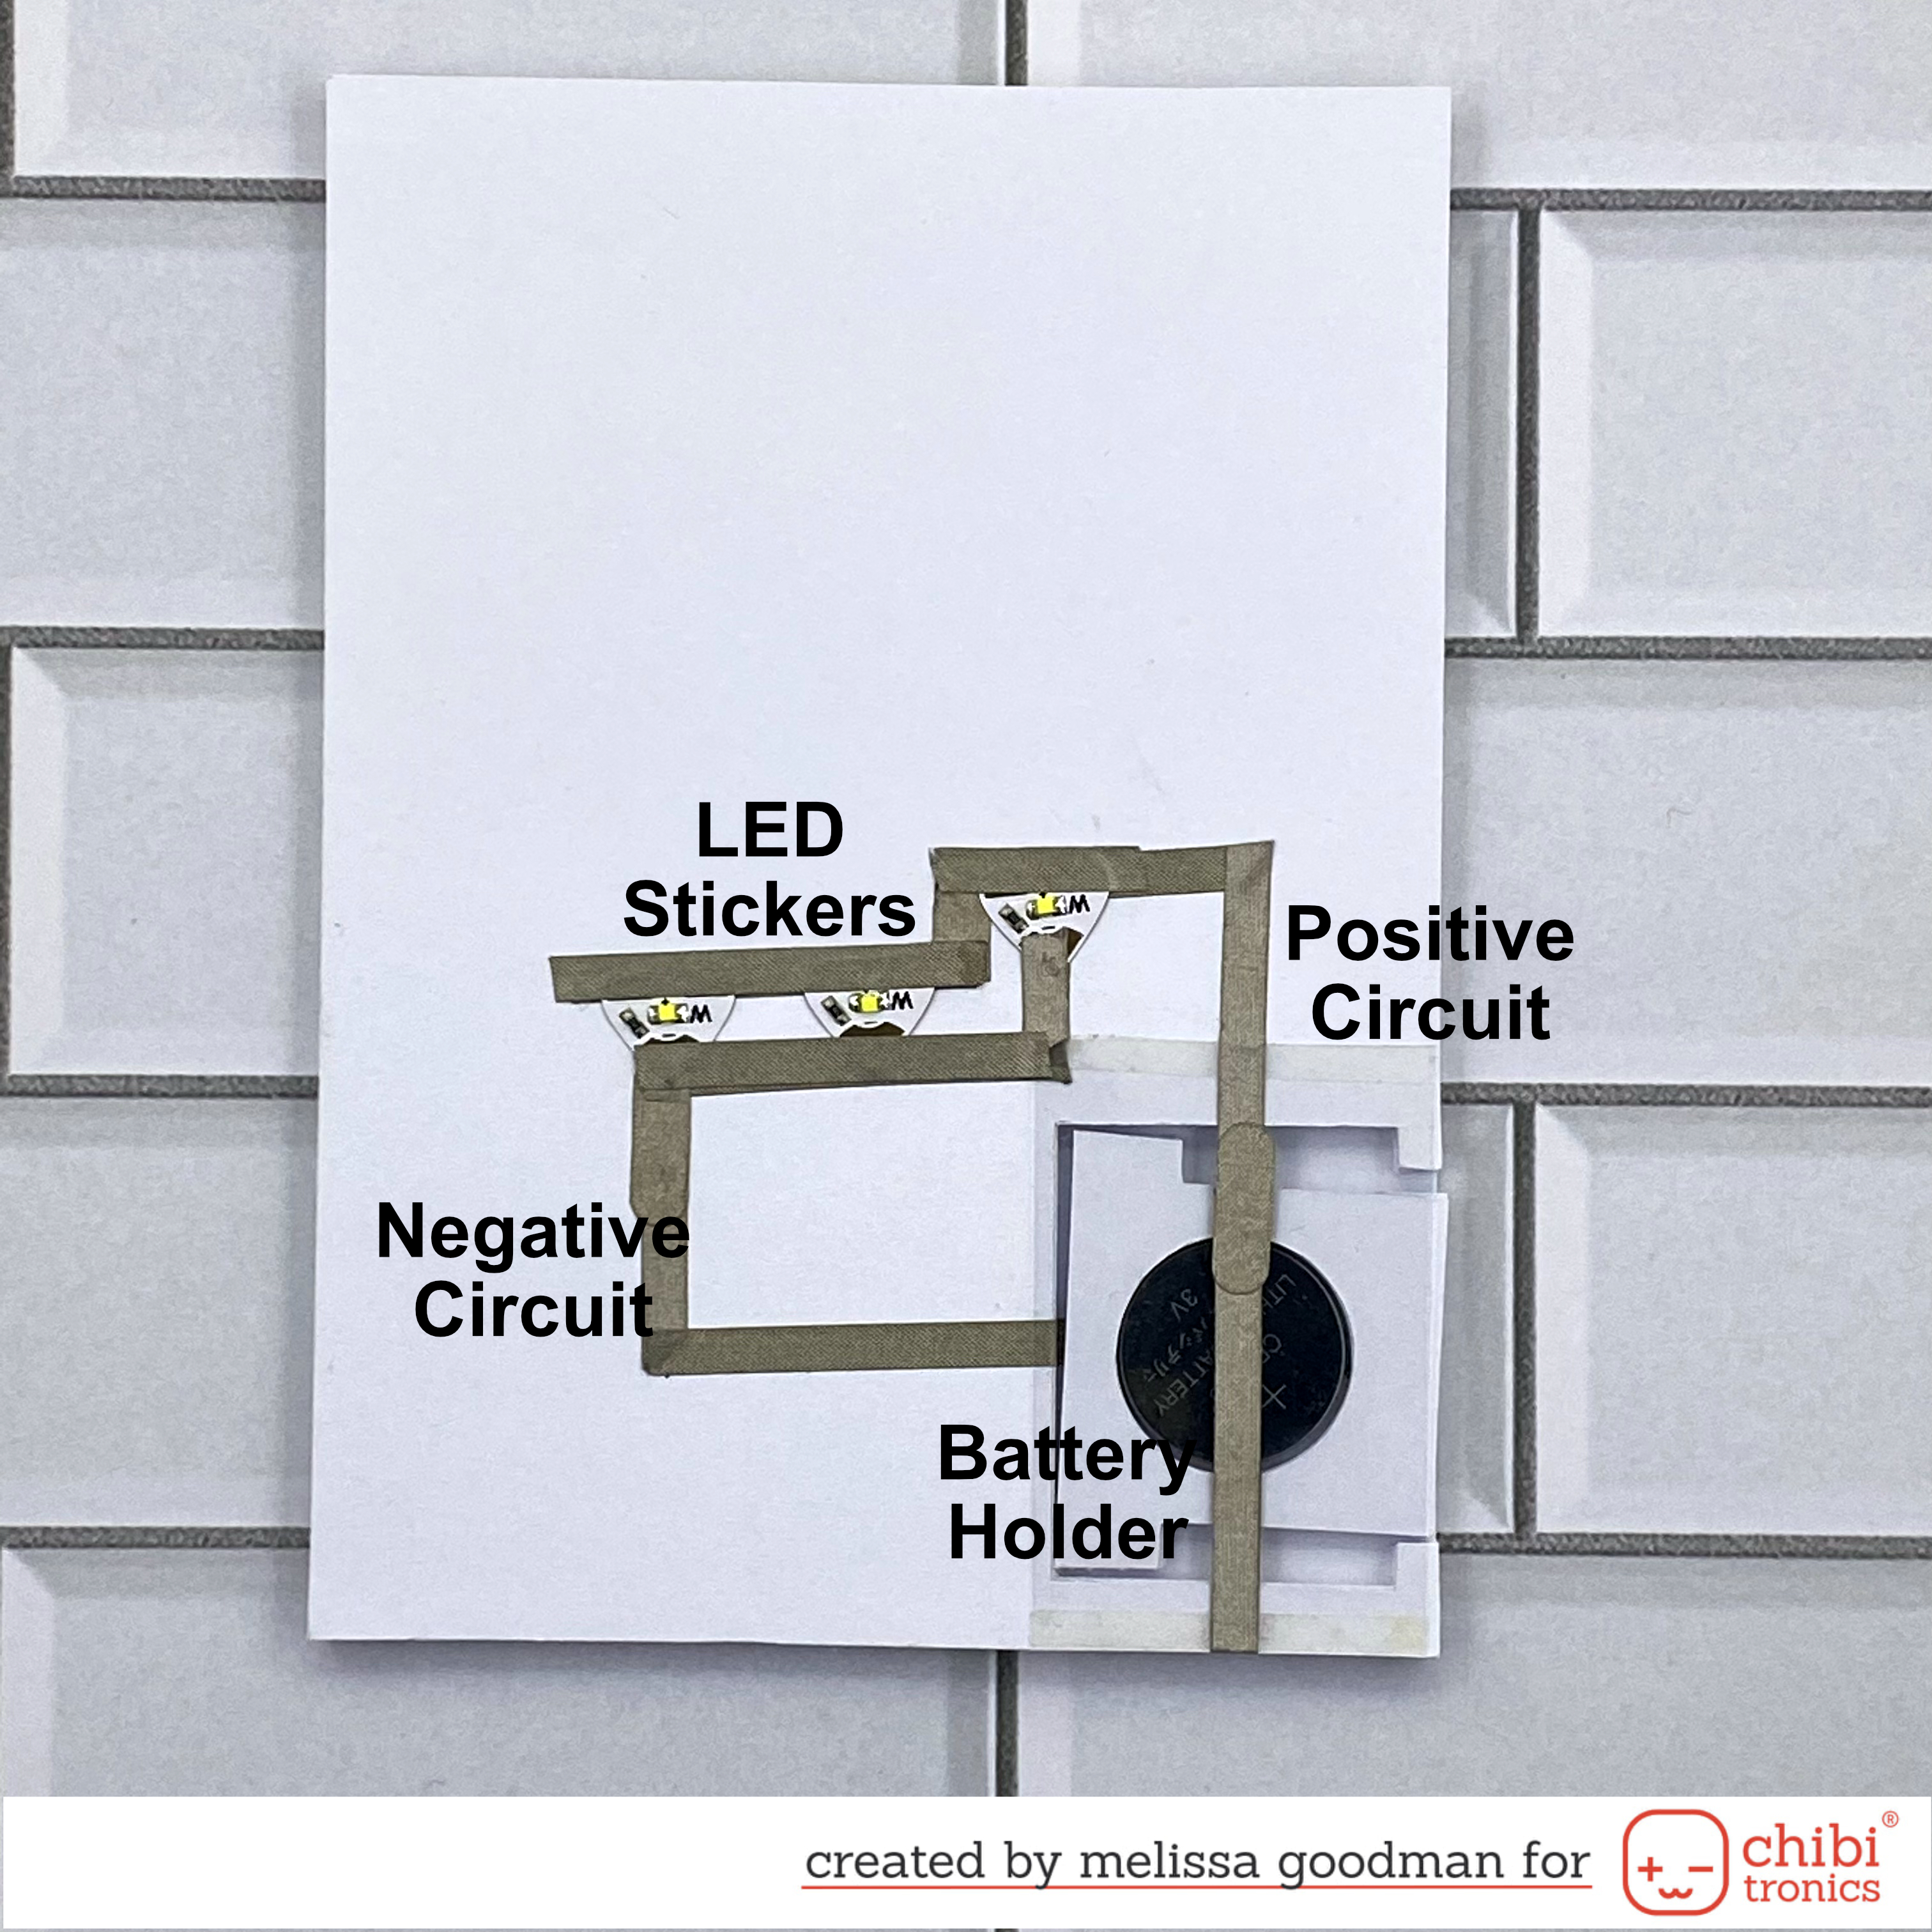
3. Circuit

The circuit has been designed on the battery holder.

I have marked where the light will go (from the card front).  I then mapped where I want the circuit to go in pencil.  This makes it easier for me to complete the circuit.


4.  Completing the Circuit

The Circuit has been complete using the Fabric Conductive Tape and LED Stickers.

This card works by pressing the bottom right hand corner (over the battery).  The positive will connect with the battery, turning on the lights.


5. Adhere the card front

It is time to adhere the card front I prepared earlier to the battery compartment.

I have used double sided tape to do this.

The coloured image have been adhered using foam tape.


6. Let's light this card up!

This circuit uses a 2016 battery to power this card.

To light this card card up, press the bottom right hand corner as shown.


I hope I have inspired you to give Chibitronics LED Stickers a go.
If you have any questions, please don't hesitate to ask.


Until next time
Melissa
xxxxx

Friday, December 17, 2021

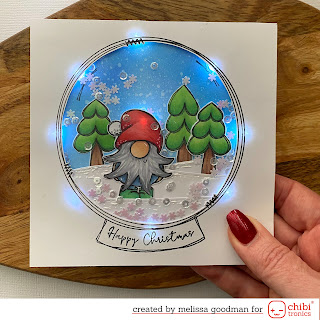
Light Up Snow Globe using Chibitronics LED Stickers

 Hi Everyone,

For today's card I have I have created using Chibitronics LED Stickers.

To be honest I wasn't sure how this card was going to work, but I am so glad I stuck with it and got it completed.


Ingredients

Stamp Set:  Merry & Bright

Medium:  Copic Markers

Sentiment:  Included in Stamp Set

Electronics:  Chibitronics LED StickersChibitronics Fabric Conductive Tape & 2016 Battery

Card Stock:  X-Press It Blending Card, Acetate

Background;  Distress Oxide (Salty Ocean)

Other:  Assorted Sequins, White Pen, Glossy Accents, Glitter


Note:  I have used the Fabric Conductive tape as I find it easier to use and it is less fragile.


1. Create card front


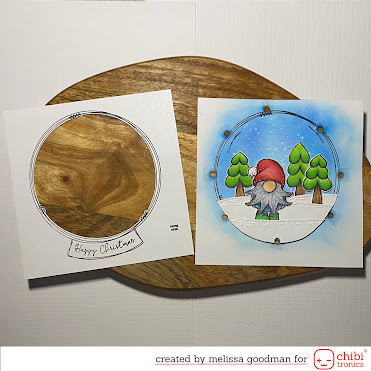
Firstly, I have stamped the images (Gnome & Trees) onto X-Press It Blending Card and coloured them with Copic Markers.  I fussy cut around the images and set them aside.

I then stamped the snow globe onto white card.  Trimmed it to 13 x 13cm.  I repeated this onto a second piece of card in the same position.

To create the base card, I used the second piece and coloured the background with Distress Ink and cut the snow banks from white card.  Adhered then onto the base added Glossy Accents & Glitter and heat set it.  I finally adhered the coloured images to this piece.

I have punched small circles where I wanted the led lights shine through. (I have glued a small piece of acetate over each hole, so the shaker mix doesn't escape)

Acetate was added to the back of the snow globe piece and the sentiment was stamped onto the front.

For the Shaker component, I have used various sequins.

Both pieces were adhered together using foam tape.

2. Circuit


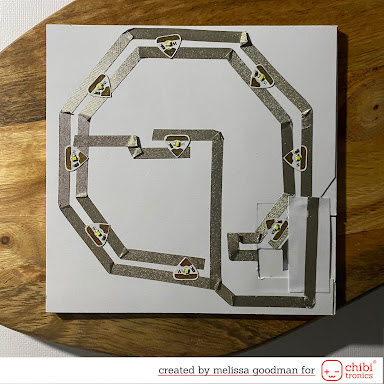
The base for this circuit is 13x13cm.  I traced where from the card front where I wanted the lights to go.

I like the batteries to be replaceable, so I have created a sliding holder for the battery so it can be changed when needed.

For this circuit, I have used the Chibitronics Fabric Conductive tape, Chibitronics LED White Stickers and a 2016 battery.  to light this card up you press the batter compartment.

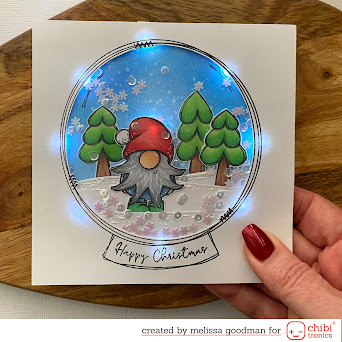
3. Time to Light up the card


To light up this card, press at the 'press here' spot with pressure from the front and the back of the card.


I hope you have found this tutorial useful.  If you have any questions, please do not hesitate to ask.

Until next time

Melissa

xxxxx

Sunday, October 22, 2017

Star Handler Snowman

Hi Everyone,

After a really busy and emotional week it was lovely to sit, colour and create.

For today's card I have used an image from Sassy Cheryl Stamps (link below).


Ingredients
Medium:  Copic Markers
Sentiment:  WRMK Typewriter
Other:  LED Lights


Until next time
Melissa
xxxxx